

And now it looks like this:

Taking it up to the ceiling was soooo worth it!!! I bought the Ikea Billy and Besta height extensions, and it looks amazing. Somehow the taller storage makes the whole room seem bigger! Eventually both side bookcases will have full length doors. I got the glass ones for the height extensions. I just haven't bothered installing the doors while all this other work is going on in here. I am prone to breaking things...
Oh, and please also notice that the trim at the bottom of these units is totally just propped up and uncut right now. I need to buy some slightly taller trim (which I will get into shortly).
But let's back the den train up! First thing I had to do was remove the trim all around the unit so that the bookcases would actually fit in wall-to-wall (there is only a 2 inch clearance!). That was tough work! Then I had to boost the height of all the units so the trim in the corners of where the wall and the built-ins meet would look even. I just cut down the extra shelves from the Besta height extension, since I don't need them, and used them under the legs of the Besta and the Billys. I was hoping that they would be completely pressboard, but the Ikea secret is that the middle is actually corrugated and useless. But the edges of the shelves were thankfully enough pressboard for my needs!


It was so much fun using my new saw that Santa gave me last Christmas!! I made a big mess, but didn't screw up so go me. :)
Getting the units onto the pressboard was super fun since the Besta unit weighs roughly a billion pounds. Through some rocking and tipping, Cam and I got it all done, though. Of course right after Cam pointed out that I forgot to permanently attach the Besta height extension to the bookcase and we had to pull it out again. Oh- and we broke the light fixture in the room! Talented couple we are! But I was always planning on replacing it, so I didn't really care.
 |
| Oops |
I cut down and reattached the trim to the wall, but not the quarter round because I am not so good at the angled cuts...I am going to buy a miter box so I can finish that off. I still need to get more trim to fill in the gap on one side the top of the unit, and around the Besta. I am reusing the old trim on the Billy bookcase bottoms, but the Besta is slightly taller so I need to get trim around 1/2 inch taller. The other issue I am having with the Besta is I originally installed these fancy legs that unfortunately are flush with the sides of the unit at the top of the legs...which makes attaching the trim tougher on the sides. On the front I can just sit the trim in front of the legs, but the Billy doors get in the way of just going in front of the legs on the side so it has to be flush with the Besta unit.
It is a little hard to explain, sorry. Anyway, it is only a tiny gap showing so I am sure I can just fill it in with something and no one will know :)
 |
| Ignore the condition of the trim, this is what I had pulled off the wall |

After everything was installed and looking fab-u-lous....I remembered there was an outlet behind the unit I wanted access to. Facepalm.
I had a rough idea of where it was so I cut into the back of the lower Besta and thankfully found it! It looks super messy, but a shelf actually perfectly hides the hole. And it is at the back of a deep cabinet so no one will ever see (except for the entire internet right now...)
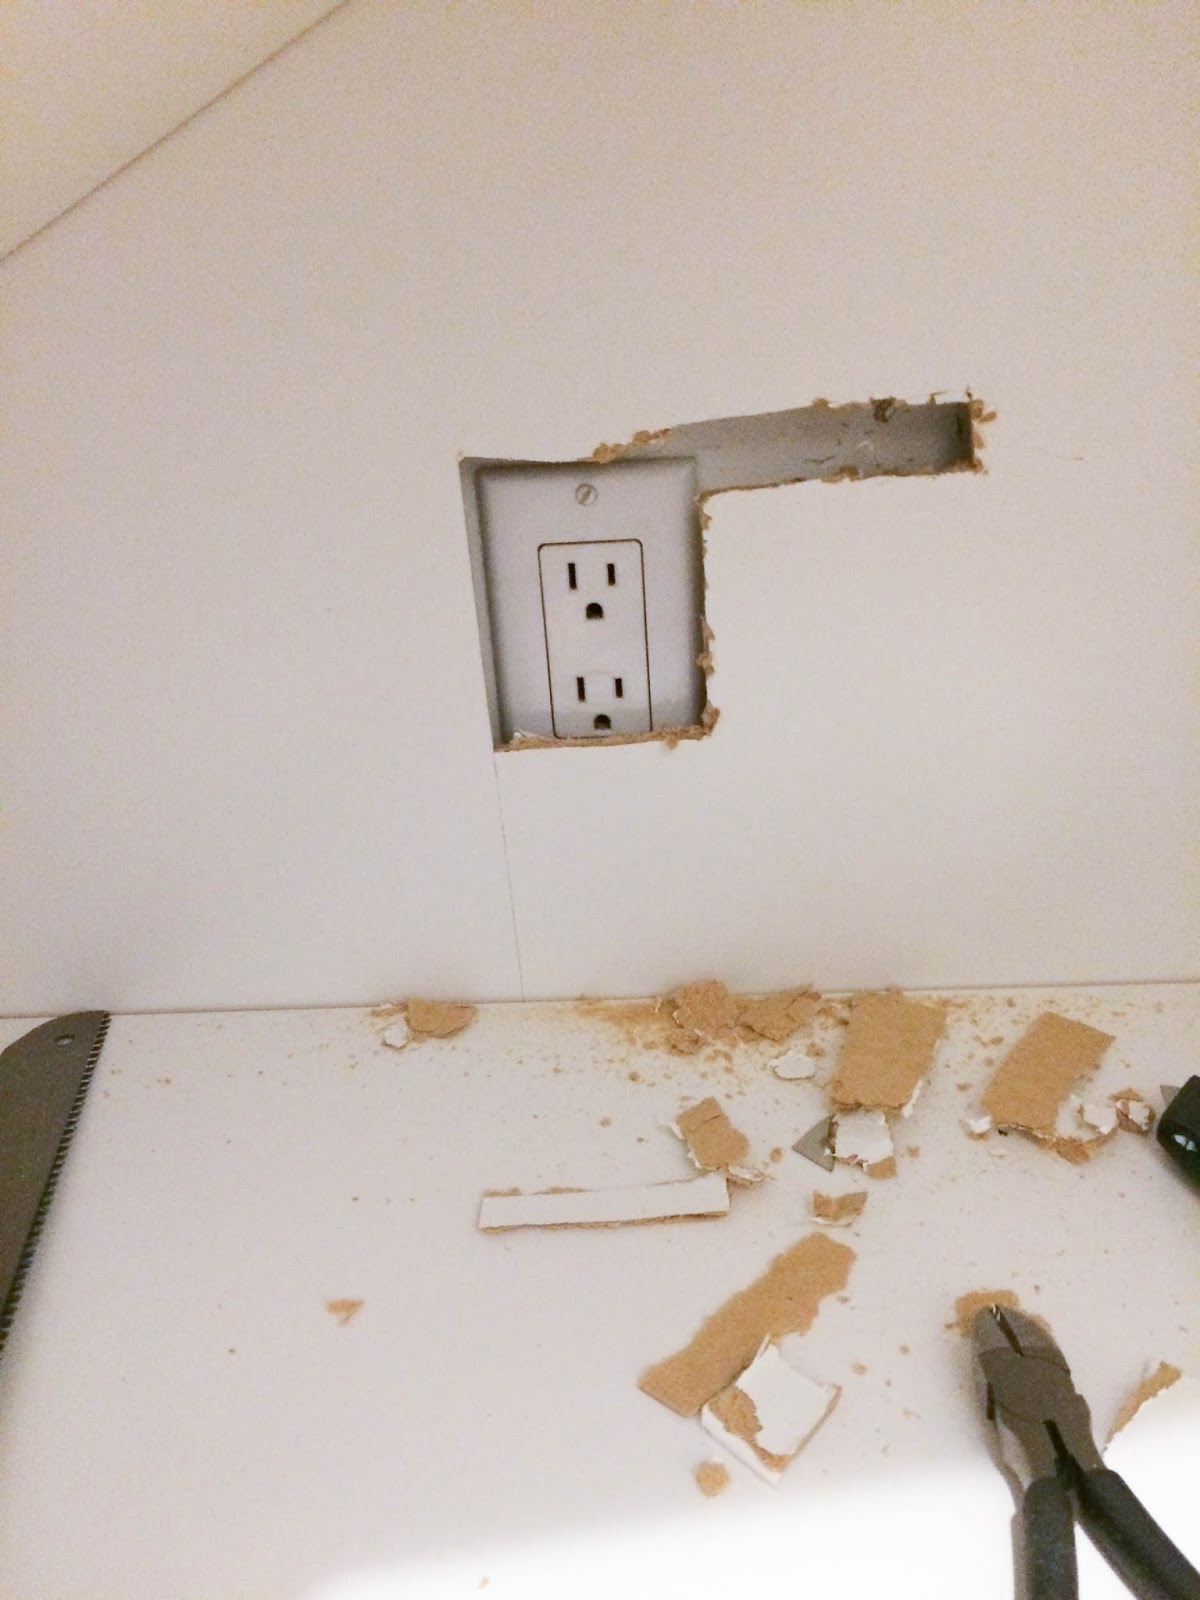

My eventual plan is to drill a hole down through the whole unit or through the back so I can plug my wireless printer in here and hide the cords. I also plan to cut out the hole a little bit more for safety, but I broke my last exacto-knife blade.
The den is really coming along! I can't wait to finish these off and then install the slim desk across from it, a larger fold down desk on the back wall, and a comfy office chair on the other side of the room. It is going to be a fabulous space for doing sewing and crafting!!

 |
| Desk will go here! |

Looking good so far! We ran into some similar trim issues when we were installing the built-in shelving in our library. I think our solution was to build a face frame for our cabinet box, and then shim the bottom of the baseboard up to meet the face frame and hide the gap at the bottom with shoe molding.
ReplyDeleteIn your case, you could probably use a strip of something thin (maybe lattice if it doesn't get in the way of the Billy doors) at the bottom of the Besta and then attach the baseboards over it. No one will notice it once it's all painted.
The billy door is basically flush with the side of the Besta, so I think a strip of white veneer will just solve the problem!
DeleteI'm in AWE my dear niece. You are SO talented and persevere until it's DONE! Very admirable! When you are finished with your place, PLEASE come help me at my house! Your work all looks amazing! xo Sheila
ReplyDeleteImpressive progress!
ReplyDelete